

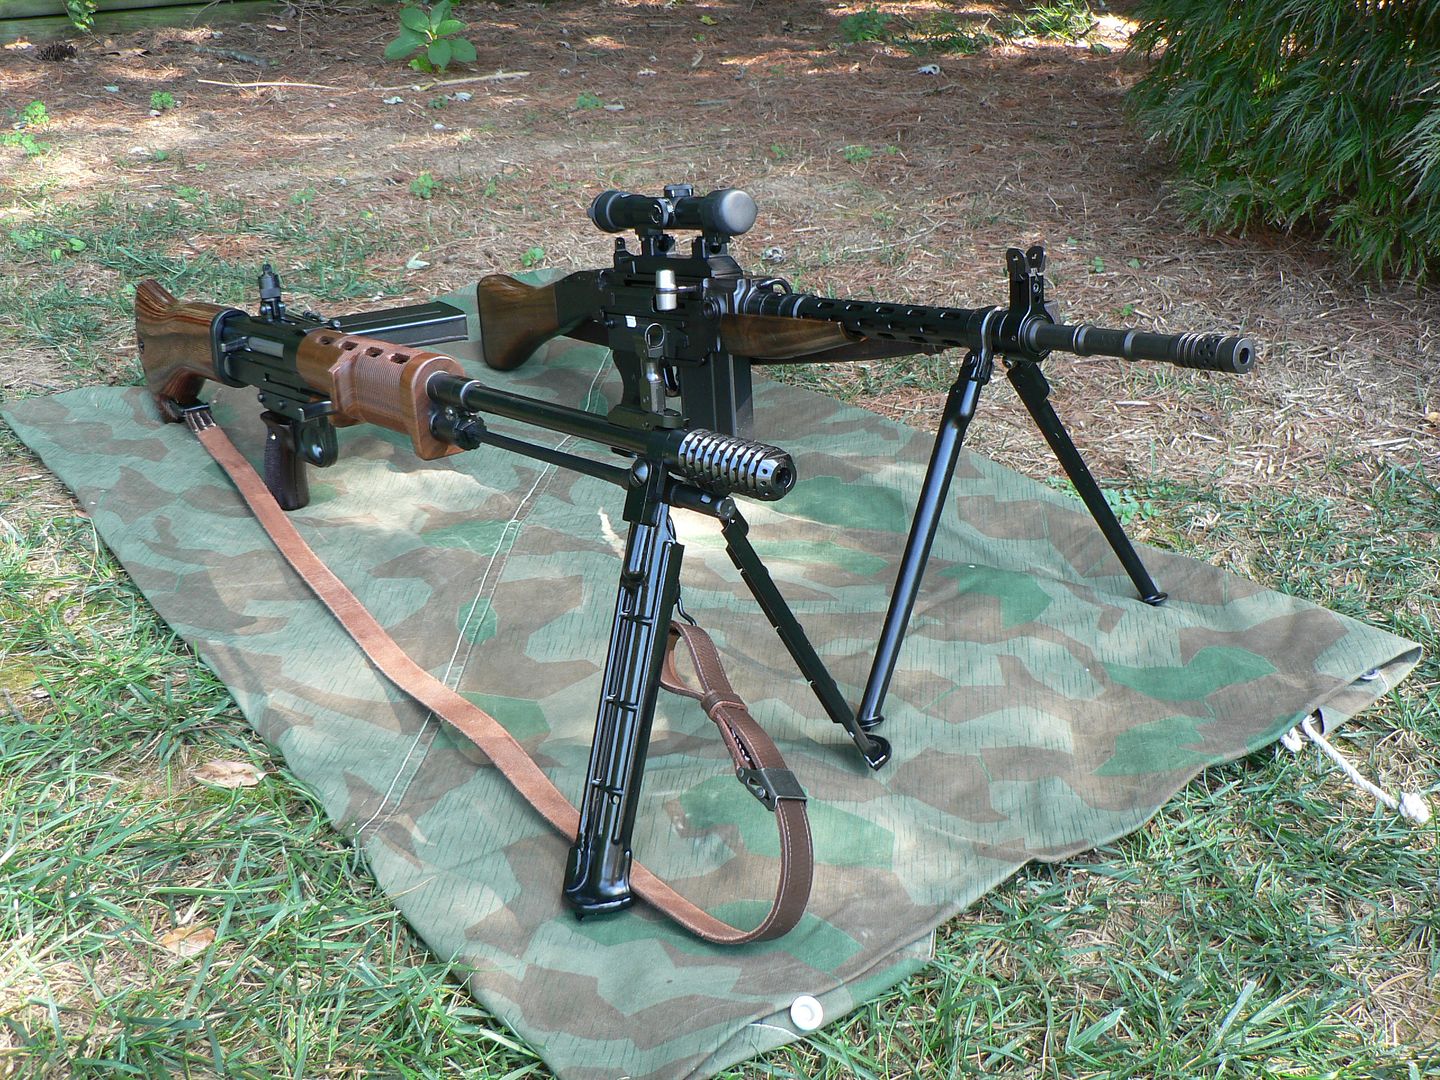
After several years of sitting on the fence, I recently picked up an FG42 made by Smith Manufacturing Group out of Decatur, Texas.
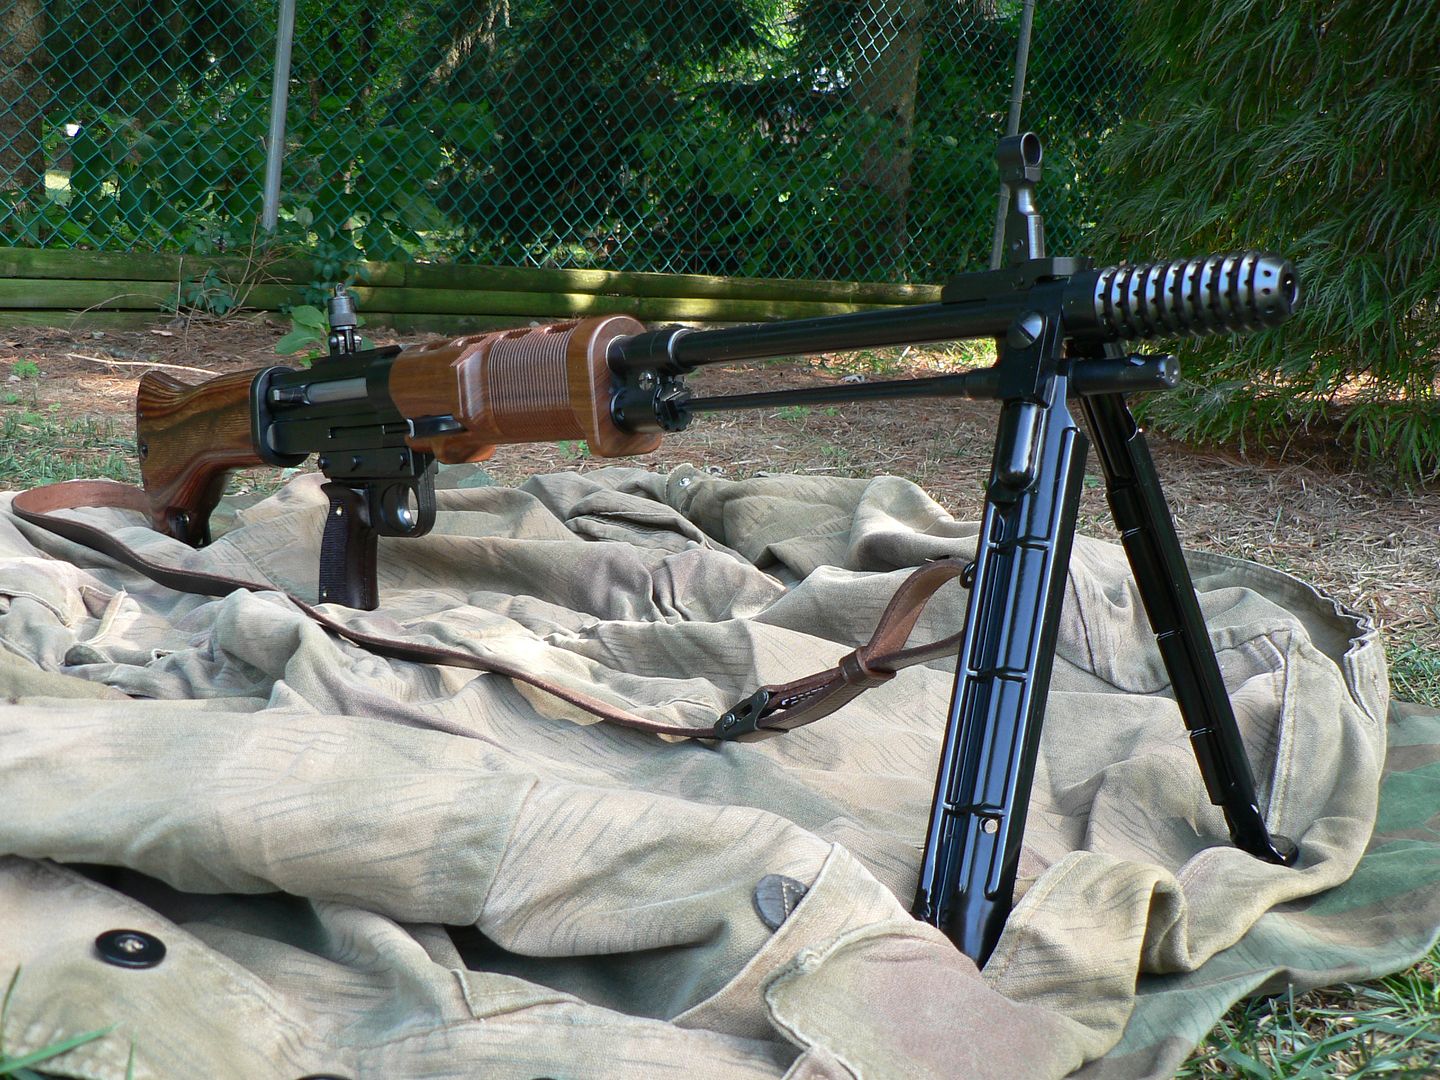
I had been following the development of these rifles since the beginning and had also been carefully scrutinizing owner feedback. Unfortunately, most guys seem to post very little information other than pictures. In fact I suspect that, given the FG42's price tag, very few of these see any range time at all. However, judging by SMG's reputation and their exhaustive testing of the rifle, I think that these are good to go. Hell, they spent more time testing and refining this reproduction than the Germans spent on the original. If anything, I figure that the SMG product is better than an original. If they are not, my typical "testing" procedures will tell the tale in time. So, I finally bit the bullet and bought one when the proper opportunity presented itself. After getting it home and reading through the manual as well as watching the included instructional video, it was time for a range trip. Before each rifle leaves the shop, it is mated to two magazines that function correctly with it and they are numbered to the rifle. This is important because the magazines that fit this rifle are generally 70+ years old and could potentially not work properly. When the magazines were made pre WWII, mating them to their rifle was standard practice. Anywho, I have 6 additional magazines and I took three of them along with the two numbered ones to the range. The rifle was already sighted in by SMG, so I fired five shots at 100 yards using one of the numbered mags, was satisfied with the results and then proceeded to fire the other 15. Cocking the rifle is an absolute bear. I assume that it will loosen up over time but it is always going to be something of a chore. That is simply an artifact of the design. Function was flawless Using Portugese FNM non corrosive manufactured in 1961. Here are the results:
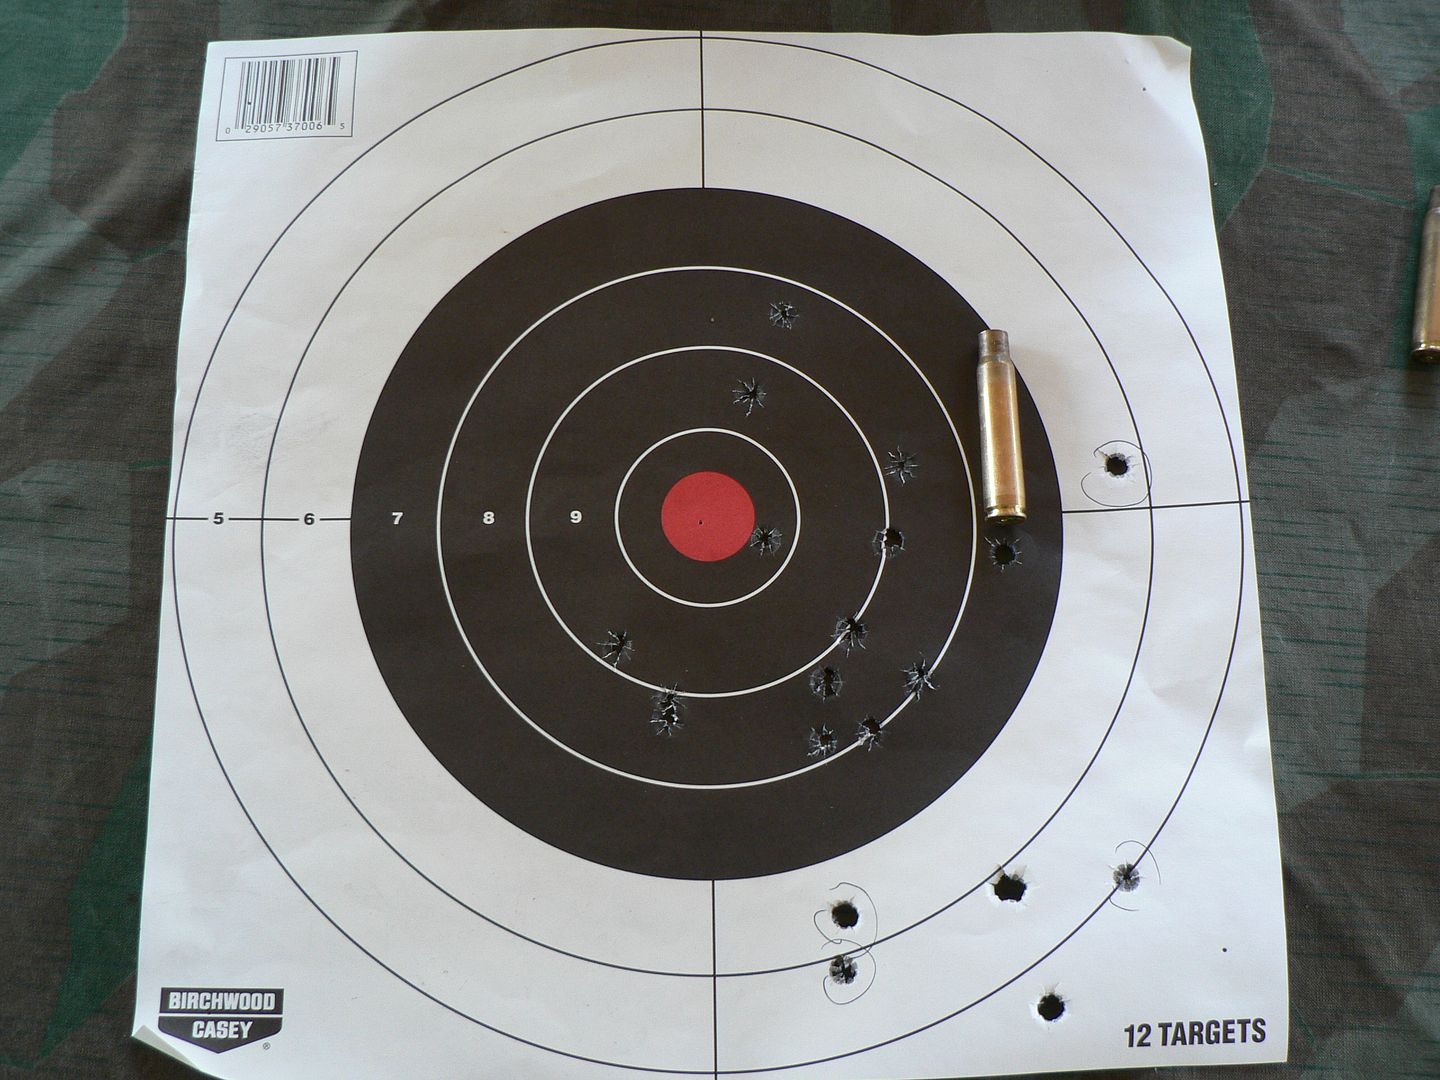
Four of the first five rounds are circled in the white and the fifth is in the black directly below the empty casing. I was aiming at the 6 0'clock position. The remaining 15 rounds were aimed at the center of the target/ The rear sight is an aperture and the front is a hooded post. Their size and the resulting sight picture makes them excellent for precise aiming. So why is the group so bad? Part of it is the fact that it is my first time out with this rifle. Part of it is the fact that I'm a terrible shot. Part of it is the trigger mechanism. It doesn't exactly allow for a precise pull. Unfortunately, that is an artifact of the design but not a concern as I knew what to expect going in. To quote the SMG website:
"The trigger pull issue HAS been improved with the newly modified sear – that will come in all new FG42 rifles. It reduces the overall length of pull about 30% and smooths it up a LOT! Instead of the loong rough pull there is now a shorter smooth pull to a crisp let off. No, it is not AR15 quality – and never will be – it is a huge improvement. So much so that it is considered a no cost upgrade on all the rifles already sold – whether it is still in warranty or not!"
I believe that mine has the modified sear and I will adapt to it in time.
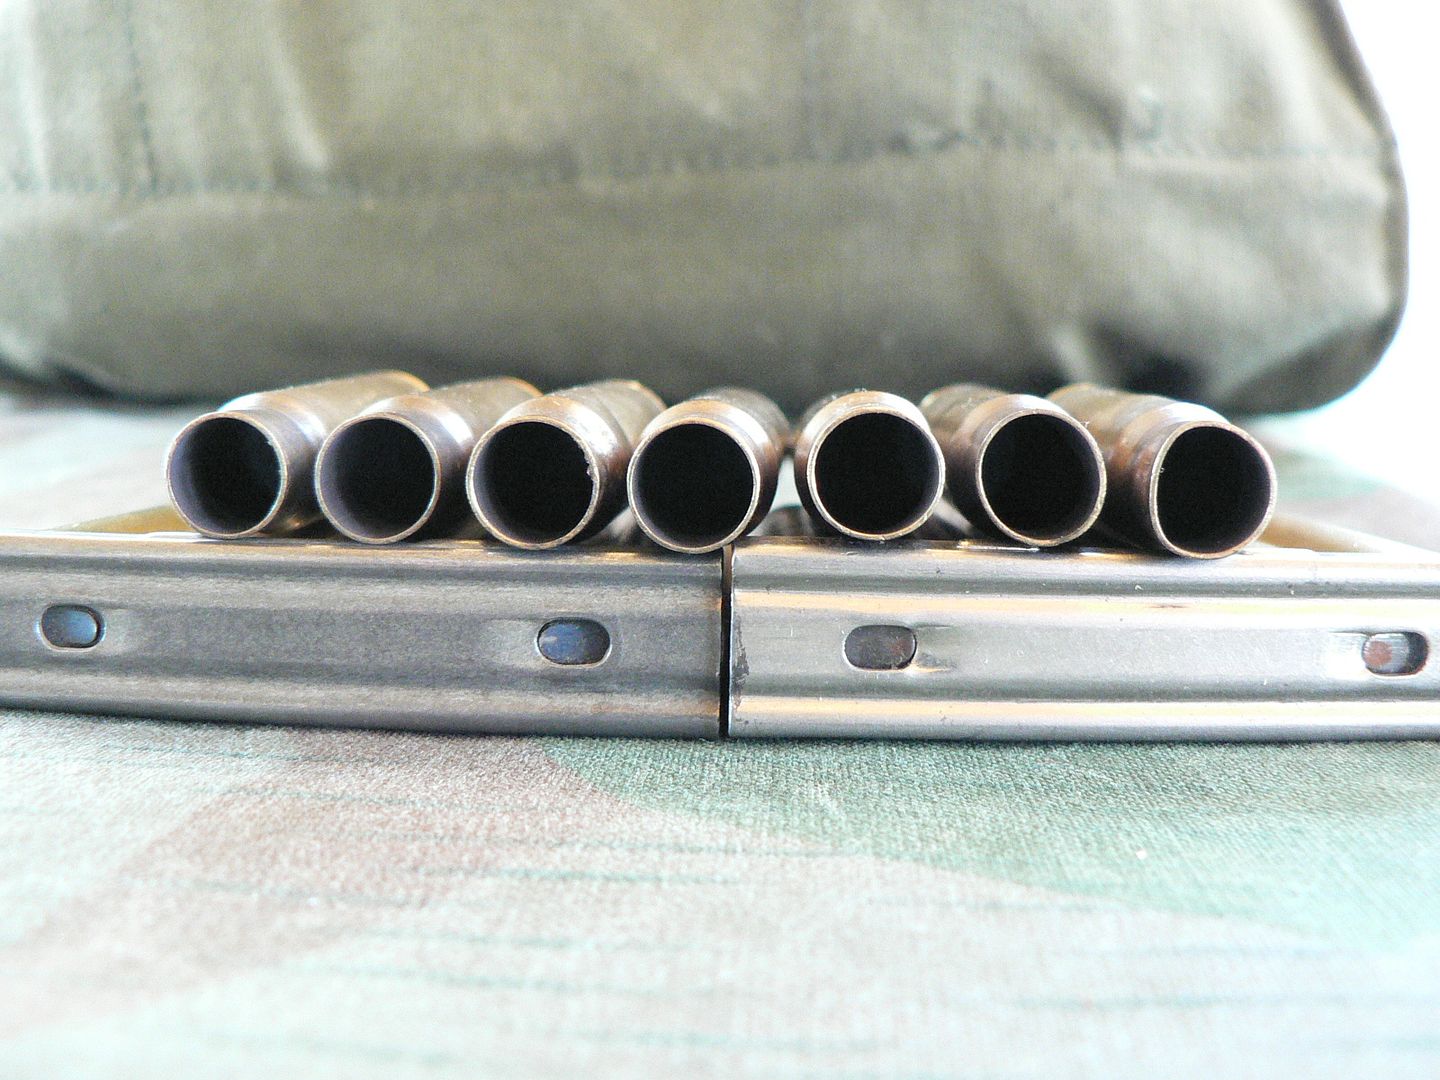
The FG42 is known for mangling empty cases and mine is no exception. Notice that two dents is common:
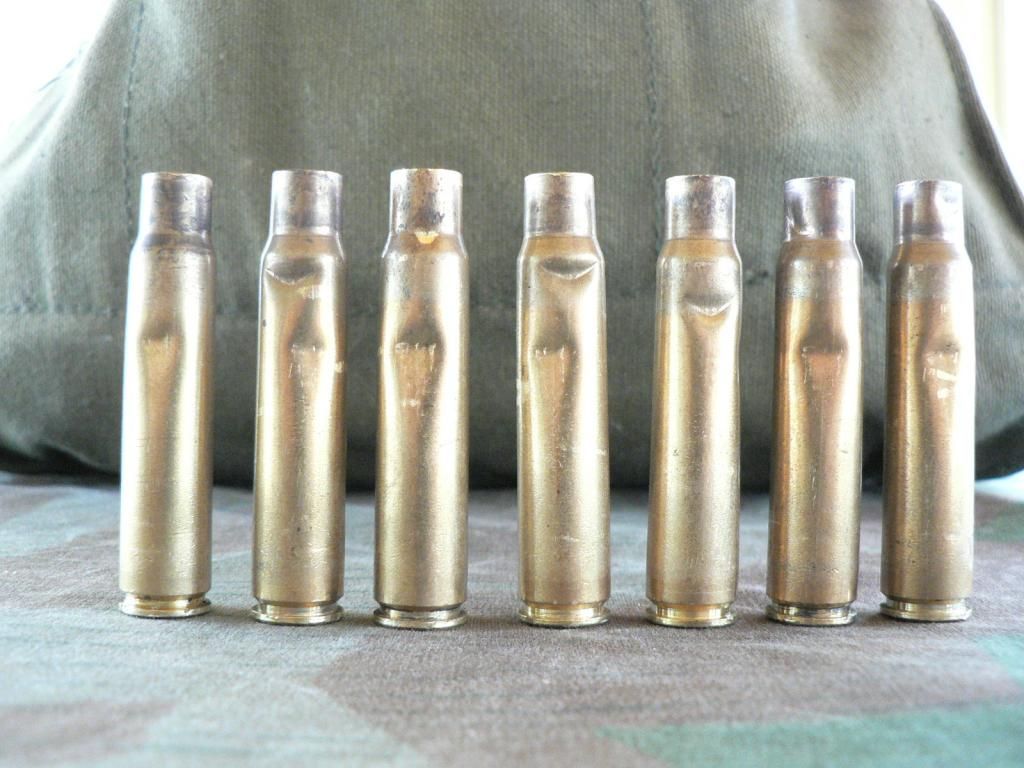
The necks can get pretty bent up too as evidenced the two on the right:
I took 100 rounds with me with the goal of sighting in the rifle and checking reliable function for 5 of my 8 magazines. I also wanted to sight in the Meopta ZF4 scope that came with it. So, after the first magazine, I moved down to the 25 yard line to get the scope on paper using numbered magazine two. Easy peezy. After a few rounds it was time to move back to 100 yards for final adjustments. That's when things started to go awry. I'm not going to bother posting the targets obtained with the scope because I had a wandering zero problem. I believe that the problem is with the mounts but I can't say for sure yet. I have plenty of experience with these scopes so I believe that it is good to go. The problem seems to be that the rings cannot be tightened down enough to grasp the scope firmly enough. So, it moved under fire. Too bad too because early results were promising. I need to mess with it some more and I'm thinking about contacting Estes Adams about a better mount design. At least I could continue to test magazines. Second numbered mag....flawless. First unnumbered mag....flawless. Second unnumbered mag....follower was sticking and will need some fitting. Third unnumbered mag did not lock in properly and would work its way loose under recoil after two rounds. In fact, it caused a jam. I couldn't pull the cocking handle back. Rick at SMG recommends that you use inertia by banging the stock on the wood bench but I didn't want to do that and needlessly dent up the wood ribs on the butt stock. So I remove the stock and bang down on the buffer. Too springy so I take off the buffer, remove the recoil spring and bang down on the rear of the receiver. The bolt starts to open but stops. Bang some more....bad idea. You see, the recoil spring is held in by the buffer and the cocking handle is held in by a plunger that is pushed on by the recoil spring. So, the cocking handle had started to fall out and promptly began to dig its way into the forearm. Once I pushed the cocking handle back forward and removed it, the bolt opened easily with minimal banging. Here is the result:
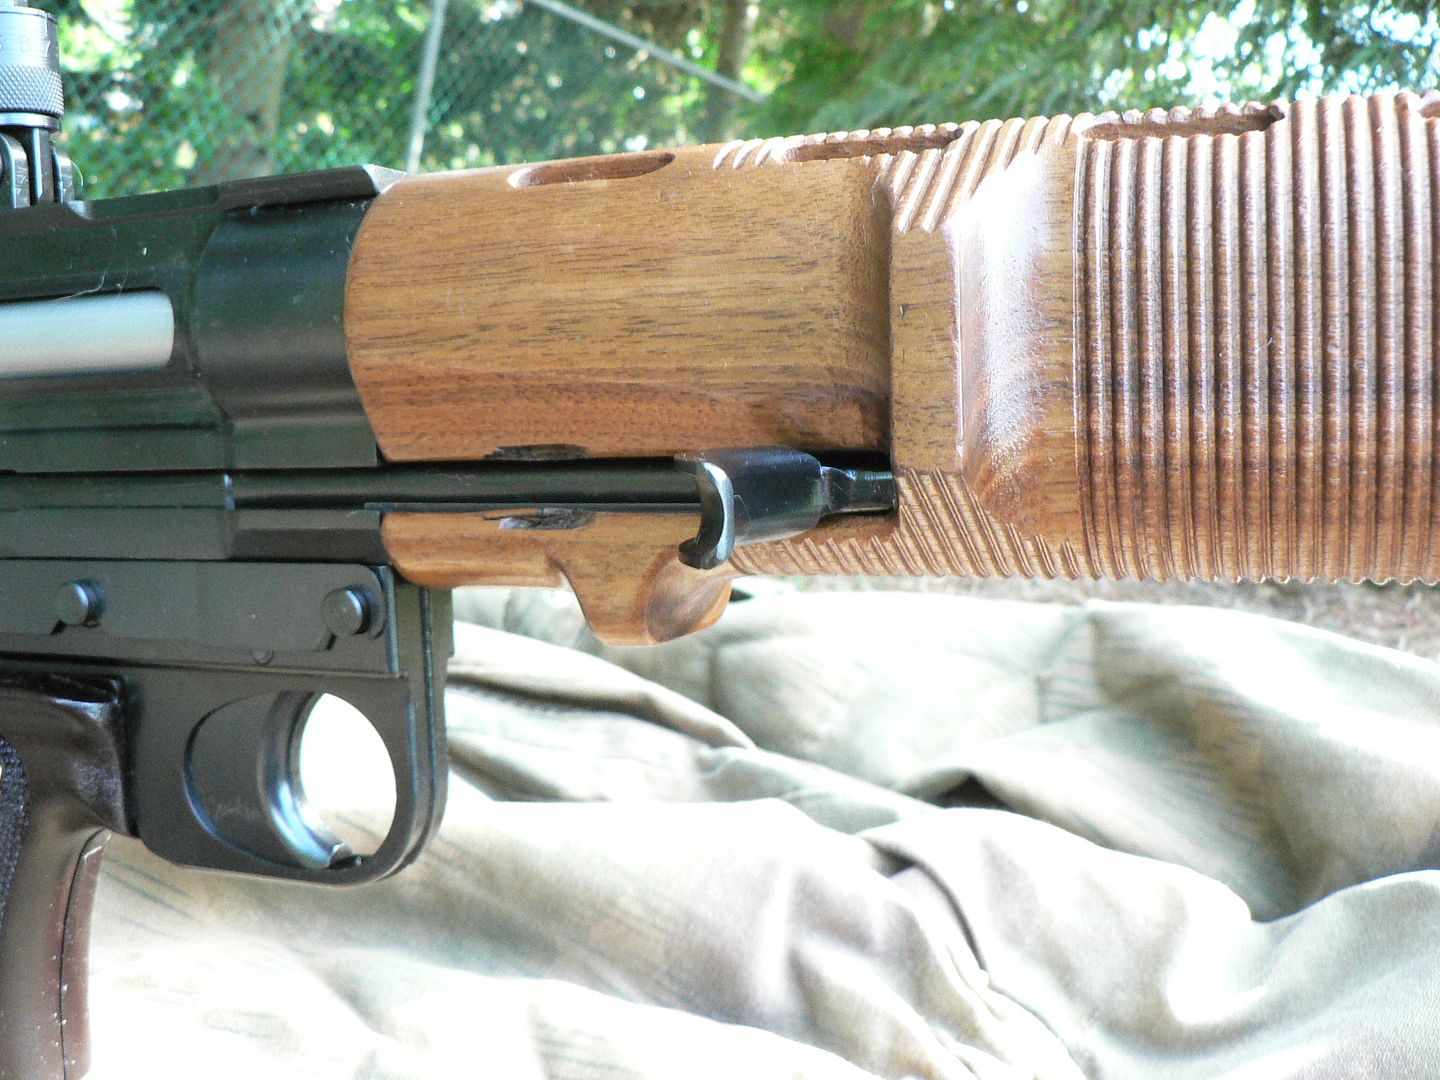
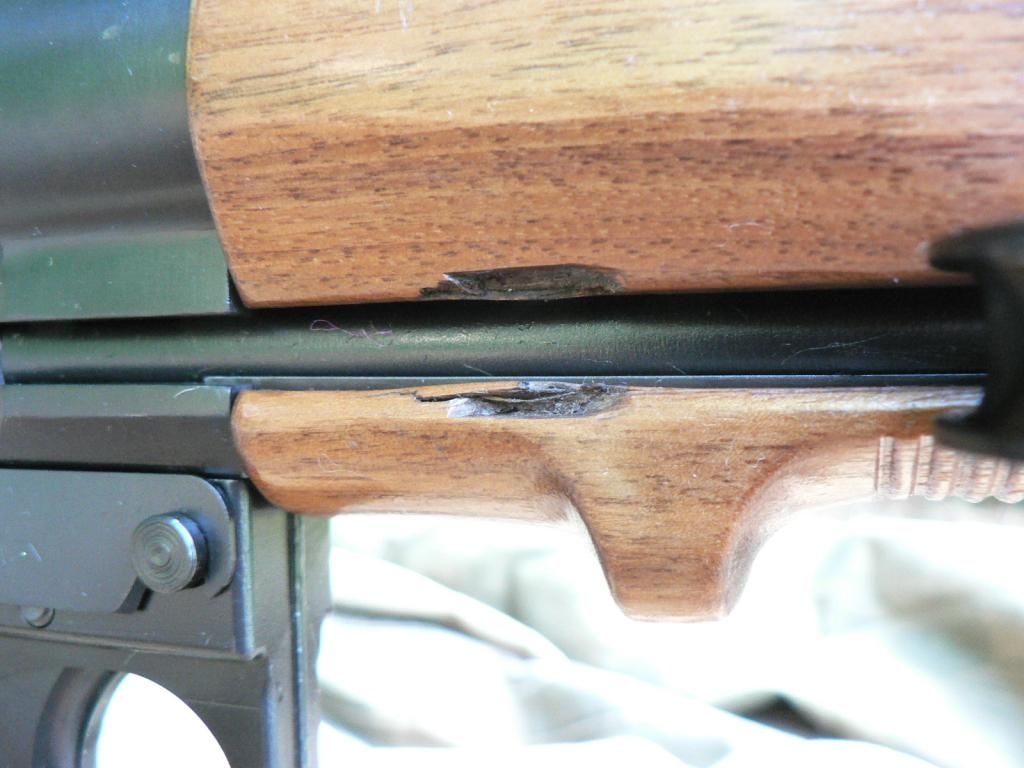
Pretty isn't it? Stupid is expensive. Anyway, the jam cleared. The forearm cannot be replaced without removing the muzzle brake adapter, front sight, gas block retainer nut and gas block. In other words, it's staying as is. I just rubbed some dirty cleaning solvent into the area and darkened up the gouges nicely. It's going to get marked up anyways so why not start immediately right?
So, that's the first of many range trips with the FG42. I have a few more magazines to test and some dirt/water/rotting leaves/other assorted funk tests to perform so I expect to get some more "beauty" marks but that will only contribute to a nice patina....I'm not big on shiny and perfect looking firearms anyways. My overall first impression of the rifle is very positive. The build quality is on par with my SIG 510 and it seems to function just fine with properly fitting and function magazines. I believe that SMG has done as well as can be done given the original design of the mechanism. Any faults with the trigger, hard initial pull when cocking or difficulty in clearing jams is inherent to the original design and not to anything done or not done by SMG.
Eventually, I'm going to do an in depth essay on this rifle simply because so few are out there and there is so little detailed information available online. But for now, I'm just going to enjoy learning it and roughing it up a little bit.

I had been following the development of these rifles since the beginning and had also been carefully scrutinizing owner feedback. Unfortunately, most guys seem to post very little information other than pictures. In fact I suspect that, given the FG42's price tag, very few of these see any range time at all. However, judging by SMG's reputation and their exhaustive testing of the rifle, I think that these are good to go. Hell, they spent more time testing and refining this reproduction than the Germans spent on the original. If anything, I figure that the SMG product is better than an original. If they are not, my typical "testing" procedures will tell the tale in time. So, I finally bit the bullet and bought one when the proper opportunity presented itself. After getting it home and reading through the manual as well as watching the included instructional video, it was time for a range trip. Before each rifle leaves the shop, it is mated to two magazines that function correctly with it and they are numbered to the rifle. This is important because the magazines that fit this rifle are generally 70+ years old and could potentially not work properly. When the magazines were made pre WWII, mating them to their rifle was standard practice. Anywho, I have 6 additional magazines and I took three of them along with the two numbered ones to the range. The rifle was already sighted in by SMG, so I fired five shots at 100 yards using one of the numbered mags, was satisfied with the results and then proceeded to fire the other 15. Cocking the rifle is an absolute bear. I assume that it will loosen up over time but it is always going to be something of a chore. That is simply an artifact of the design. Function was flawless Using Portugese FNM non corrosive manufactured in 1961. Here are the results:

Four of the first five rounds are circled in the white and the fifth is in the black directly below the empty casing. I was aiming at the 6 0'clock position. The remaining 15 rounds were aimed at the center of the target/ The rear sight is an aperture and the front is a hooded post. Their size and the resulting sight picture makes them excellent for precise aiming. So why is the group so bad? Part of it is the fact that it is my first time out with this rifle. Part of it is the fact that I'm a terrible shot. Part of it is the trigger mechanism. It doesn't exactly allow for a precise pull. Unfortunately, that is an artifact of the design but not a concern as I knew what to expect going in. To quote the SMG website:
"The trigger pull issue HAS been improved with the newly modified sear – that will come in all new FG42 rifles. It reduces the overall length of pull about 30% and smooths it up a LOT! Instead of the loong rough pull there is now a shorter smooth pull to a crisp let off. No, it is not AR15 quality – and never will be – it is a huge improvement. So much so that it is considered a no cost upgrade on all the rifles already sold – whether it is still in warranty or not!"
I believe that mine has the modified sear and I will adapt to it in time.
The FG42 is known for mangling empty cases and mine is no exception. Notice that two dents is common:

The necks can get pretty bent up too as evidenced the two on the right:

I took 100 rounds with me with the goal of sighting in the rifle and checking reliable function for 5 of my 8 magazines. I also wanted to sight in the Meopta ZF4 scope that came with it. So, after the first magazine, I moved down to the 25 yard line to get the scope on paper using numbered magazine two. Easy peezy. After a few rounds it was time to move back to 100 yards for final adjustments. That's when things started to go awry. I'm not going to bother posting the targets obtained with the scope because I had a wandering zero problem. I believe that the problem is with the mounts but I can't say for sure yet. I have plenty of experience with these scopes so I believe that it is good to go. The problem seems to be that the rings cannot be tightened down enough to grasp the scope firmly enough. So, it moved under fire. Too bad too because early results were promising. I need to mess with it some more and I'm thinking about contacting Estes Adams about a better mount design. At least I could continue to test magazines. Second numbered mag....flawless. First unnumbered mag....flawless. Second unnumbered mag....follower was sticking and will need some fitting. Third unnumbered mag did not lock in properly and would work its way loose under recoil after two rounds. In fact, it caused a jam. I couldn't pull the cocking handle back. Rick at SMG recommends that you use inertia by banging the stock on the wood bench but I didn't want to do that and needlessly dent up the wood ribs on the butt stock. So I remove the stock and bang down on the buffer. Too springy so I take off the buffer, remove the recoil spring and bang down on the rear of the receiver. The bolt starts to open but stops. Bang some more....bad idea. You see, the recoil spring is held in by the buffer and the cocking handle is held in by a plunger that is pushed on by the recoil spring. So, the cocking handle had started to fall out and promptly began to dig its way into the forearm. Once I pushed the cocking handle back forward and removed it, the bolt opened easily with minimal banging. Here is the result:


Pretty isn't it? Stupid is expensive. Anyway, the jam cleared. The forearm cannot be replaced without removing the muzzle brake adapter, front sight, gas block retainer nut and gas block. In other words, it's staying as is. I just rubbed some dirty cleaning solvent into the area and darkened up the gouges nicely. It's going to get marked up anyways so why not start immediately right?
So, that's the first of many range trips with the FG42. I have a few more magazines to test and some dirt/water/rotting leaves/other assorted funk tests to perform so I expect to get some more "beauty" marks but that will only contribute to a nice patina....I'm not big on shiny and perfect looking firearms anyways. My overall first impression of the rifle is very positive. The build quality is on par with my SIG 510 and it seems to function just fine with properly fitting and function magazines. I believe that SMG has done as well as can be done given the original design of the mechanism. Any faults with the trigger, hard initial pull when cocking or difficulty in clearing jams is inherent to the original design and not to anything done or not done by SMG.
Eventually, I'm going to do an in depth essay on this rifle simply because so few are out there and there is so little detailed information available online. But for now, I'm just going to enjoy learning it and roughing it up a little bit.


 I also noticed they had an update for the type 1 that they will eventually be making....!
 but different strokes for different folks.


