Third Party Press

G43 Frankenbuild: Not for the faint at heart.

Status
Not open for further replies.
How do you plan to address the bolt cover crack? Are you going to have it welded and restored or try to replace it? With the shooter's kit you shouldn't have to worry about the bolt striking the rear, but it still might let go and pop out?

IMO nothing to be concerned about. Many G/K43 rifles exhibit this "crack" in the bolt housing, some more, some less pronounced. You are correct in your assumption that using a shooter kit will take stress away from this part, as substantial damage to the back ends of bolt housings has been caused by the bolts slamming into them. I have seen cases where the entire back end of the bolt housing had become brittle and tore off around the edges.

The "crack" is not actually not a crack. The bolt housing is made from sheet metal, much like rolling a cigarette (or a joint, if you're from California or Colorado :laugh:). The back end is then folded over and a cup shaped reinforcement welded against it from the inside. The "crack" is where the folded parts overlap. The hole near the "crack" has no supporting function at all. The bolt housing is held in place by two pins poking through the holes at center line. The hole near the crack is only there to allow the firing pin extension to pass through while cycling.
 
I assume you are saying you saw a problem on my bolt face? I will check it out.

The bolt face should be flush. G41 and G/K43 tend to develop a raised rim around the firing pin hole, often caused by dry firing. The firing pin is tapered at the tip and its forward motion is stopped by the firing pin hole being much smaller than the actual firing pin diameter, only allowing the tip to protrude. The center area of the bolt face around the firing pin hole is not very thick and dry firing will slowly but steadily displace the thin metal, forming a rim around the firing pin hole. This can lead to all kinds of problem: With a worn, slightly short firing pin you won't be able to dent the primer enough to ignite the charge as the pin may not extend sufficiently above the rim. If the rim is tall and headspace is tight, the rim itself can set off the primer while the bolt goes into battery, unintentionally turning your G43 into a class 3 firearm. Of course, depending on features (diameter, depth) resembling a primer pocket in your head space gauges, the rim could also result in false readings.

I usually knock the rim down by standing the bolt on a solid level surface (anvil) and using a 3/8" diameter steel drift punch. From then on, STOP dry firing. Leave that to Fat Ben of Classic Firearms.
 
14dTrJ3l8XOYGysPKxhJgw8j5S9-h_9-F-EBmhHPOK9CAXfxweMcoLr5bPpM3R6j6B4YyrtI-KMAHhoXGn2caBuqJM0JCt-rTUYIvFPG9JX-Z1gGF45UnvRwCCRrhTtAhxNOVowmYf9CmLBUfEsQZtP7ZWQU5gtLug6RyRkMa0YyNZ6Odyi9ny40xcIK9konW1Db0hbSzYZNuLn5L8550Sgqb-kJoUypMh8UzM20urZQc28Drim7P1-NX22mjf1cO7WKyXPaSZcAAny0ylb3qlrWxQu2aZe2c_l5O758_-WxcGXLDgFQ0jlBwRt-cEk9GV6fPgBKUUV08fDMUrJDAjA1SkXX1Udc0lDI_8zpTTVjybF_rfutmCg6CdF-taKlc9RGVjEVvui0OD0a7HKzc1A8ovd0HsuJCo_kcHW7_e7zUHyy9ukCWsjmHrYadsqnCzSEvRDO9J-YUIaLDU7cWgJiGItE_AHPX66nd_Y21iH7bPMC63_UYWMDisKVpec3AtS_G06T7WoTzoQySCVAKiCOfCld0hArSNEmcPeQdZ410cVR_CO3ohCJtZ29QCzxkC8DDBzy-J3AExXIIiICjGdDwr6dEeYHqgrQbDhEc_aiOurXqayI6qS_=w1225-h919-no

So, after I was able to remove the shooters kit piston, it was no problem punching out the pin and sliding the gas block from it's position on the barrel. I will have to cut that monstrosity of a front sight off to get the gas block the rest of the way off the barrel. The gas block definitely looks like it was torqued/twisted at some point which was causing the misalignment of the gas system and subsequent binding. Is it possible to torque the gas block back to being straight without breaking it? Any suggestions on how? I have an idea.
 
Can someone explain why I set this post to send me automatic email notifications of replies, but have yet to get the first one? I check back to find new replies, but no emails. ????
 
G43 Frankenbuild

I just finished doing what you are about to undertake and mine was worse, enjoy it for what it is, there are not many people that can say they have owned a G43 or even shot one. You have a piece of history, unless your a collector and have the exception of a numbers matching grade rifle that's over $3000 you have a rifle you can enjoy finding parts for and in 10 years it will as good as gold.
 
The bolt face should be flush. G41 and G/K43 tend to develop a raised rim around the firing pin hole, often caused by dry firing....

Anther thanks! I just looked at mine and it does have a small raised rim around the firing pin hole. We who are used to Garands and M14s with the big solid block of steel would never think of that.
 
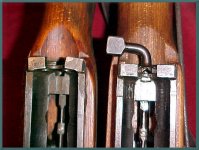
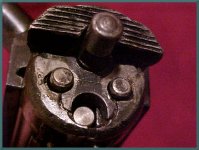
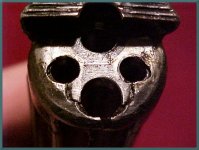
Here's some pictures of the kind of damage found on these rifles. Their gas systems are very over powered. I highly recommend a shooters kit from these folks as well before shooting these pieces. Some of the best gunsmiths on these rifles too from this site.

And you shoot Garands and M14 rifles huh?

I as well like too own and shoot a few of those ping rifles and I'm having an M14 rifle being built from U.S GI parts only. On a forged made receiver.

Damage.jpg damage 2.jpg damage 3.jpg

http://apfeltor.com/
 
Here's some pictures of the kind of damage found on these rifles. Their gas systems are very over powered. I highly recommend a shooters kit from these folks as well before shooting these pieces. Some of the best gunsmiths on these rifles too from this site.

And you shoot Garands and M14 rifles huh?

I as well like too own and shoot a few of those ping rifles and I'm having an M14 rifle being built from U.S GI parts only. On a forged made receiver.

http://apfeltor.com/


First thing I did when I decided to shoot mine was order an Applegate shooter's kit. I ordered some extra small orifices also. He shipped them quickly and the product is machined extremely well. When working up loads I put tape on the bolt cover to make sure the carrier didn't come back to within 1/4" of the rear.

Yep, I have 3 Garands and built up 3 M14 demil kits I got from Armscorp back in the '80s. 1 Winchester and 2 TRW kits are now on 1 Springfield M1a receiver and two Fulton Armory M14SA recievers. Still have the wrench, M1/M14 barrel vice, and barrel/sight clocking tools.

I do say the K-43 is smoother operating than the Garand/M14.
 
Here's some pictures of the kind of damage found on these rifles. Their gas systems are very over powered. I highly recommend a shooters kit from these folks as well before shooting these pieces. Some of the best gunsmiths on these rifles too from this site.

And you shoot Garands and M14 rifles huh?

I as well like too own and shoot a few of those ping rifles and I'm having an M14 rifle being built from U.S GI parts only. On a forged made receiver.

View attachment 156685 View attachment 156686 View attachment 156687

http://apfeltor.com/


First thing I did when I decided to shoot mine was order an Applegate shooter's kit. I ordered some extra small orifices also. He shipped them quickly and the product is machined extremely well. When working up loads I put tape on the bolt cover to make sure the carrier didn't come back to within 1/4" of the rear.

Yep, I have 3 Garands and built up 3 M14 demil kits I got from Armscorp back in the '80s. 1 Winchester and 2 TRW kits are now on 1 Springfield M1a receiver and two Fulton Armory M14SA recievers. Still have the wrench, M1/M14 barrel vice, and barrel/sight clocking tools.
 
I just finished doing what you are about to undertake and mine was worse, enjoy it for what it is, there are not many people that can say they have owned a G43 or even shot one. You have a piece of history, unless your a collector and have the exception of a numbers matching grade rifle that's over $3000 you have a rifle you can enjoy finding parts for and in 10 years it will as good as gold.
Thanks. This rifle is going to be just a parts build. Something fun to shoot and to talk about. Now the Cole table G43 to talk about is the last one I had in my shop. It's the BCD build by Jewish slave labor, all correct and matching and functional. My good buddy, who I am buying all these parts from got that one cause I just couldn't swing the funds even at the great price be asked...$1500. It's at least a $2500-$3000 piece. When I'm done with this build I will have $1300 in it.
 
Package arrived today with "new" barreled action and NOS 95% polish made stock. See pictures. Please tell me what you can about the markings on the barrel and receiver. An "ac" receiver is made by Mauser right? Bore looks pretty good. I think barrel is original to receiver. Rear of receiver is nice and straight, not bent. Everything looks good to me. Stock needs material removed from recoil lug area and on the exterior as well. Good thing I have that original cutdown stock as a go-by! :)
IMG_4262.JPG

IMG_4263.JPG

IMG_4257.JPG


Markings on barrel: bys
IMG_4249.JPG

IMG_4250.JPG

IMG_4251.JPG


Receiver markings: G43 3032h ac 44
IMG_4252.JPG

IMG_4253.JPG

I'm curious about the "h" after the SN. Anybody got a clue?

It's coming together! Please let me know what you think and any info on the numbers you can share. Thanks.
 
Last edited:
I just finished doing what you are about to undertake and mine was worse, enjoy it for what it is, there are not many people that can say they have owned a G43 or even shot one. You have a piece of history, unless your a collector and have the exception of a numbers matching grade rifle that's over $3000 you have a rifle you can enjoy finding parts for and in 10 years it will as good as gold.
Did you have any headspcing issues during your build?
 
Package arrived today with "new" barreled action and NOS 95% polish made stock. See pictures. Please tell me what you can about the markings on the barrel and receiver. An "ac" receiver is made by Mauser right? Bore looks pretty good. I think barrel is original to receiver. Rear of receiver is nice and straight, not bent. Everything looks good to me. Stock needs material removed from recoil lug area and on the exterior as well. Good thing I have that original cutdown stock as a go-by! :)
I'm curious about the "h" after the SN. Anybody got a clue?

It's coming together! Please let me know what you think and any info on the numbers you can share. Thanks.

Looks good already. "ac" is for Walther-Werke Zella-Mehlis, production year 1944. The "h" after the serial number is the letter block. Here's a long list of all recorded G43 and K43 rifles:
http://claus.espeholt.dk/mediearkiv/g43k43_c.pdf
Your rifle is listed on page 9.
 
Looks good already. "ac" is for Walther-Werke Zella-Mehlis, production year 1944. The "h" after the serial number is the letter block. Here's a long list of all recorded G43 and K43 rifles:
http://claus.espeholt.dk/mediearkiv/g43k43_c.pdf
Your rifle is listed on page 9.
Thanks Gunkraut. That helps. Now I need to fix my headspace issue. Field gauge did not pass. Flappers just barely locked in battery. One spare set of flappers on the way from my friend. After that what options do I have.
 
Thanks Gunkraut. That helps. Now I need to fix my headspace issue. Field gauge did not pass. Flappers just barely locked in battery. One spare set of flappers on the way from my friend. After that what options do I have.

First you need to scrub the chamber. If you have a 3 piece Hoppe's cleaning rod, screw two pieces together, get an over size brass or Nylon cleaning brush and a mop, stick into a drill chuck and work the chamber with Hoppe's bore cleaner. 10-15 seconds should be enough to clean a dirty chamber. After that, you need to check if the bolt goes into battery without a round. If that's OK, you know the geometry of barrel groove, locking lugs and firing pin housing are a functional combination. If you still have problems chambering a round and closing the bolt, try another bolt or other locking lugs as the combination of bolt cutout and locking lug length is one part of the head space equation.

Also, remove the firing pin and firing pin extension and carefully chamber a live round because at the end of the days you'll be firing ammo and not some field gauges of unknown provenance (I remember discussions about SAAMI spec and other head space gauges for Mauser).

I have thoroughly scrubbed and cleaned barrel and chamber. Both look exceptional. I tested bolt for lockup without anything I chamber. It locked up fine. I pushed agains bolt face with cleaning rod to make sure I was locked in battery. I have several inert 8mm ammo that chambered (as my go gauge.) extractor and firing pin have been removed. Now I've been testing withought the bolt carrier, just sliding bolt into the chamber by hand using an Allan wrench in the firingpin carrier notch to operate flappers, which I thought would be acceptable. I then tested the NO GO gauge. It locked up into
battery with no problem. I pulled on the rear of the bolt to see if it was actually locked in place. It was. I then tested The FIELD gauge which should t lock up at all. It locked up just enough to hold in battery when I pulled on the rear of bolt. Even though it would easily fall out of battery if receiver was bumped, it definitely did lock up, even if slightly. I will test the spare set of locking flappers when they arrive and hope they pass testing. To blindly order new flappers at $75 a pop hoping they work properly can get expensive. My bolt seems good. Buying a new one will be even more expensive. Of course if that is what will make this rifle shoot, I'm not against the idea.
 
Last edited:
I'm getting very close to completing the assembly of the build. Once gas block, front and rear sight are installed, I will be able to install everything back into the old sporterized stock the bad barreled receiver came out of and give the parts gun a test fire. The shooters kit gas system will need tweaking of course, but I have no doubt I can get it working safely.

After that I will need to turn my attention to finishing the inletting and exterior shaping of the Polish reproduction stock. I can use the old sporterized stock to some extent as a "go by" but it is not an ORIGINAL stock. Is there a diagram/ drawing that gives various dimensions that I can reference when doing the final shaping? I know I can reference a multitude of pictures, as well as those I took of my buddies matching bcd when I worked on cleaning it up and getting it into safe firing condition. I'm sure he could provide key dimensions if needed. Just wondering if there are other resources out there that could help.

And what finishing method should I use on the stock? I see some that look like they only have linseed oil on bare laminated wood. Others look stained a darker reddish brown. And the old original stocks have that deep reddish brown color similar to those of surplus M1 Garands. I have an HRA in original condition and I like that color.
 
I had Rob Applegate do all my work, I good with some stuff but that was way above my head. My rifle was turned into a 3006 hunting rifle, Rob did an amazing job.
 
Status
Not open for further replies.

Military Rifle Journal
Back
Top